98-0425
Senior Member
- First Name
- Nick
- Joined
- Jun 18, 2017
- Threads
- 146
- Messages
- 1,484
- Reaction score
- 1,225
- Location
- Las Vegas
- Vehicle(s)
- 18 Civic Type-R #12307, 98 Integra Type-R #0425, 07 Pilot EX-L, 17 Pilot Elite
- Thread starter
- #1
A minor luxury that is standard and new on the 2019 Civic is the glove box light. The 2016-2018 model year has the cutout and mounting spot in the glove box cover assembly already. The question is if Honda had made this piece with expectations to have the light assembly placed, why didn't they do it starting from the first model year. Who knows.
Items you will need:
1. Glove box light assembly from 2019 Civic/2007-2009 CRV (part number 34254-SWA-003)
2. OEM plug for the light assembly (part number 04321-SH2-307)
3. OEM wires (subcord) that attach inside the plug (part number 04320-SP0-A00)
4. Optional: OEM self-tapping screws x2 (part number 93913-2422) or find something in your toolbox
5. 18 gauge wires (optional soldering iron/solder/heatshrink or butt connectors) to extend the OEM wires
6. Wire taps/posi taps/quick connects
7. 1/4” ground ring and something to crimp it onto the wire
8. Electrical tape
9. Phillips screwdriver
10. Interior trim removal tool or wrapped flathead screwdriver
11. 10mm & 8mm socket and ratchet
12. Large and small cable ties

The Process:
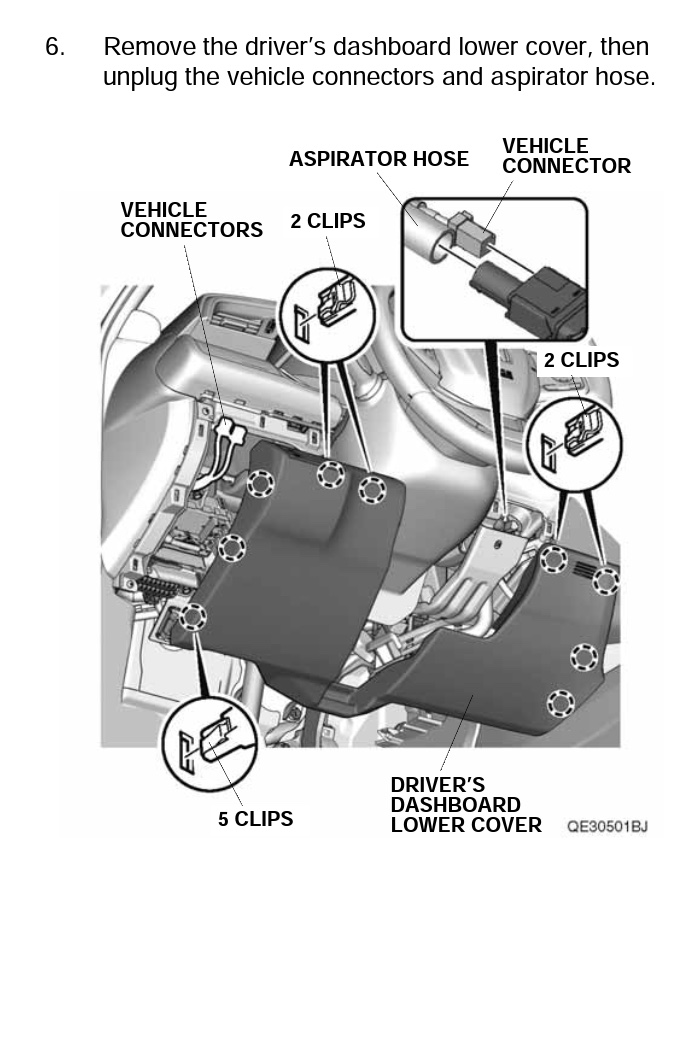
1. Start by removing the negative terminal of the battery. Diassemble the passenger dash side panel, lower trim panel, glove box, and glove box cover. US models did not get the damper, so ignore that step. Just pull on the glove box to remove it. Remove the driver side dash panel. Ignore the red X to remove the side panel. I found out during disassembly that you do need to remove it.


2. Mount the glove box light assembly to the glove box cover using the two self-tapping screws. You can replace the bulb with an LED bulb at this time.


3. Place the OEM wires into the OEM plug. You push the wires in until clicks. Then snap the “flap” to lock in the wires. Begin by sliding the prongs of the flap into the grooves in the plug; then push down on the back end to snap it into place.


3. Extend the ground and power wires. Measure about 14” for the ground wire; 5’ for the power wire. Solder and heatshrink, or use butt connectors. Crimp on the 1/4” ground ring.

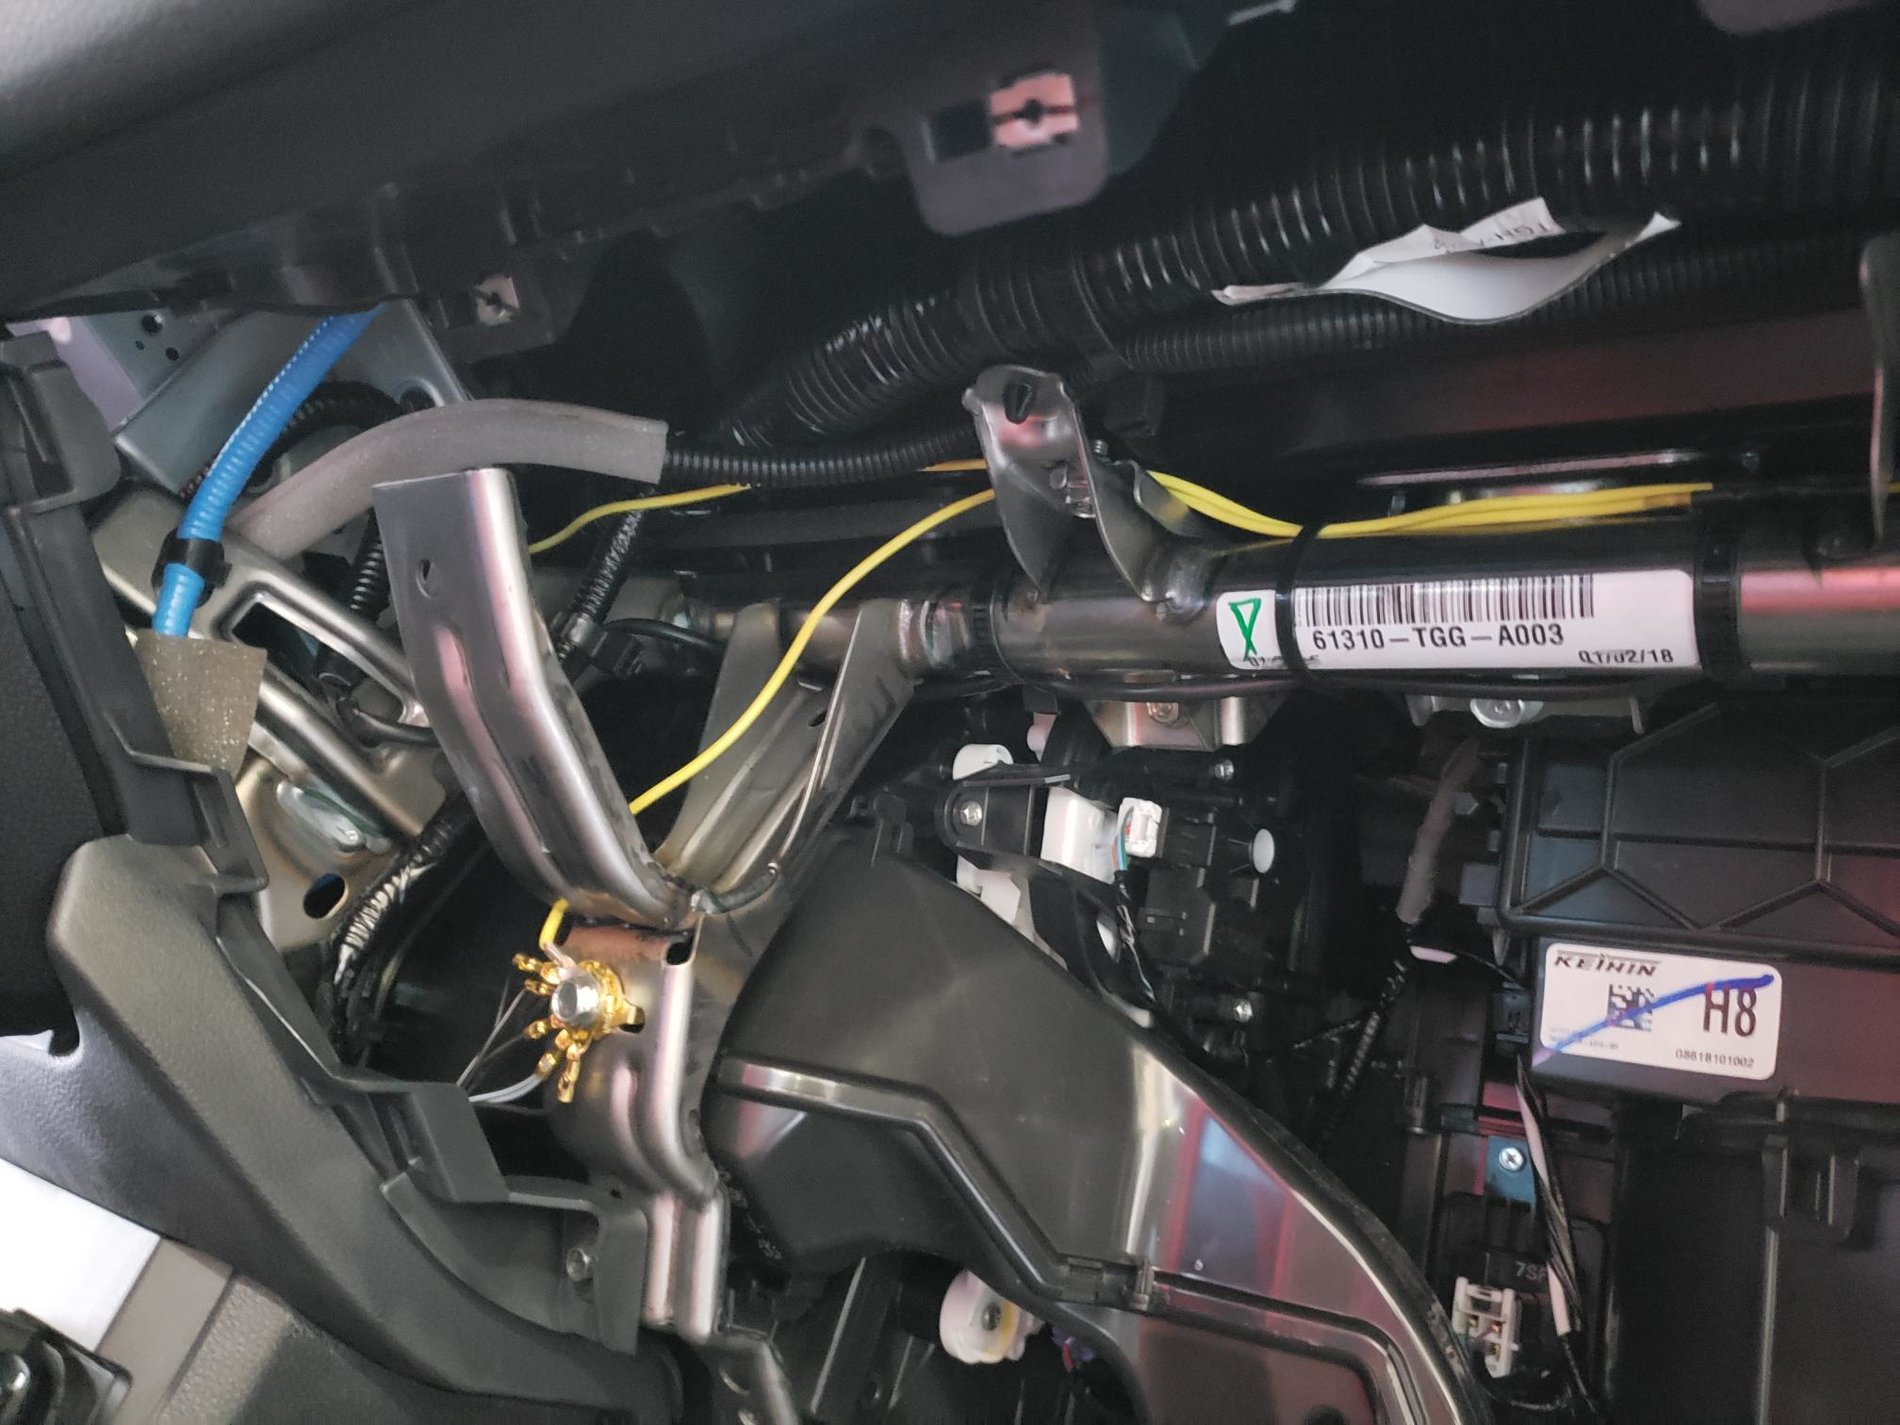
4. Route the wires like so, using cable ties to secure the wires to the dash frame. Ground the ring terminal, using the 10mm socket.
5. Now, you will need to fish the power wire to the interior fusebox. For a cleaner install, you can remove the climate control/infotainment so you can route the wire. Use an 8mm socket to remove the two bolts under the infotainment. Grab the screen on the top and bottom corners on one side, and give it a tug. You don't need to remove the plugs from the infotainment, just pull it out enough so you can reach behind it to run the power wire. I used a wire clothes hanger from the driver side to help fish the wire down.


6. Run the power wire however you want to the right side of the fuse box. To the right of the fuse box there is a plug with a thin red wire. That wire is 12v constant, and I believe it goes to the maplight. Tap that red wire.


7. Reinstall all the dash pieces.
8. Enjoy your new glove box light.


I have an extra OEM plug and wires, ring terminal, and wire tap. PM me if you're interested, $10 shipped. Otherwise you will need to buy in bulk to get these items.
Items you will need:
1. Glove box light assembly from 2019 Civic/2007-2009 CRV (part number 34254-SWA-003)
2. OEM plug for the light assembly (part number 04321-SH2-307)
3. OEM wires (subcord) that attach inside the plug (part number 04320-SP0-A00)
4. Optional: OEM self-tapping screws x2 (part number 93913-2422) or find something in your toolbox
5. 18 gauge wires (optional soldering iron/solder/heatshrink or butt connectors) to extend the OEM wires
6. Wire taps/posi taps/quick connects
7. 1/4” ground ring and something to crimp it onto the wire
8. Electrical tape
9. Phillips screwdriver
10. Interior trim removal tool or wrapped flathead screwdriver
11. 10mm & 8mm socket and ratchet
12. Large and small cable ties
The Process:
1. Start by removing the negative terminal of the battery. Diassemble the passenger dash side panel, lower trim panel, glove box, and glove box cover. US models did not get the damper, so ignore that step. Just pull on the glove box to remove it. Remove the driver side dash panel. Ignore the red X to remove the side panel. I found out during disassembly that you do need to remove it.
2. Mount the glove box light assembly to the glove box cover using the two self-tapping screws. You can replace the bulb with an LED bulb at this time.
3. Place the OEM wires into the OEM plug. You push the wires in until clicks. Then snap the “flap” to lock in the wires. Begin by sliding the prongs of the flap into the grooves in the plug; then push down on the back end to snap it into place.
3. Extend the ground and power wires. Measure about 14” for the ground wire; 5’ for the power wire. Solder and heatshrink, or use butt connectors. Crimp on the 1/4” ground ring.
4. Route the wires like so, using cable ties to secure the wires to the dash frame. Ground the ring terminal, using the 10mm socket.
5. Now, you will need to fish the power wire to the interior fusebox. For a cleaner install, you can remove the climate control/infotainment so you can route the wire. Use an 8mm socket to remove the two bolts under the infotainment. Grab the screen on the top and bottom corners on one side, and give it a tug. You don't need to remove the plugs from the infotainment, just pull it out enough so you can reach behind it to run the power wire. I used a wire clothes hanger from the driver side to help fish the wire down.
6. Run the power wire however you want to the right side of the fuse box. To the right of the fuse box there is a plug with a thin red wire. That wire is 12v constant, and I believe it goes to the maplight. Tap that red wire.
7. Reinstall all the dash pieces.
8. Enjoy your new glove box light.
I have an extra OEM plug and wires, ring terminal, and wire tap. PM me if you're interested, $10 shipped. Otherwise you will need to buy in bulk to get these items.
Last edited:
