spoonsportsusa
Spoon.Official
- Joined
- Jun 29, 2017
- Threads
- 3
- Messages
- 28
- Reaction score
- 171
- Location
- Orange, CA
- Website
- www.spoonusa.com
- Vehicle(s)
- FK8 Civic Type R, FD2 Civic Type R, GK5 Fit RS, S2000
- Thread starter
- #1
We've swapped the springs out a few times already so we just wanted to share the method that is quickest for us. Total time for the front is about 1 hour and rear is 10 minutes.
Front
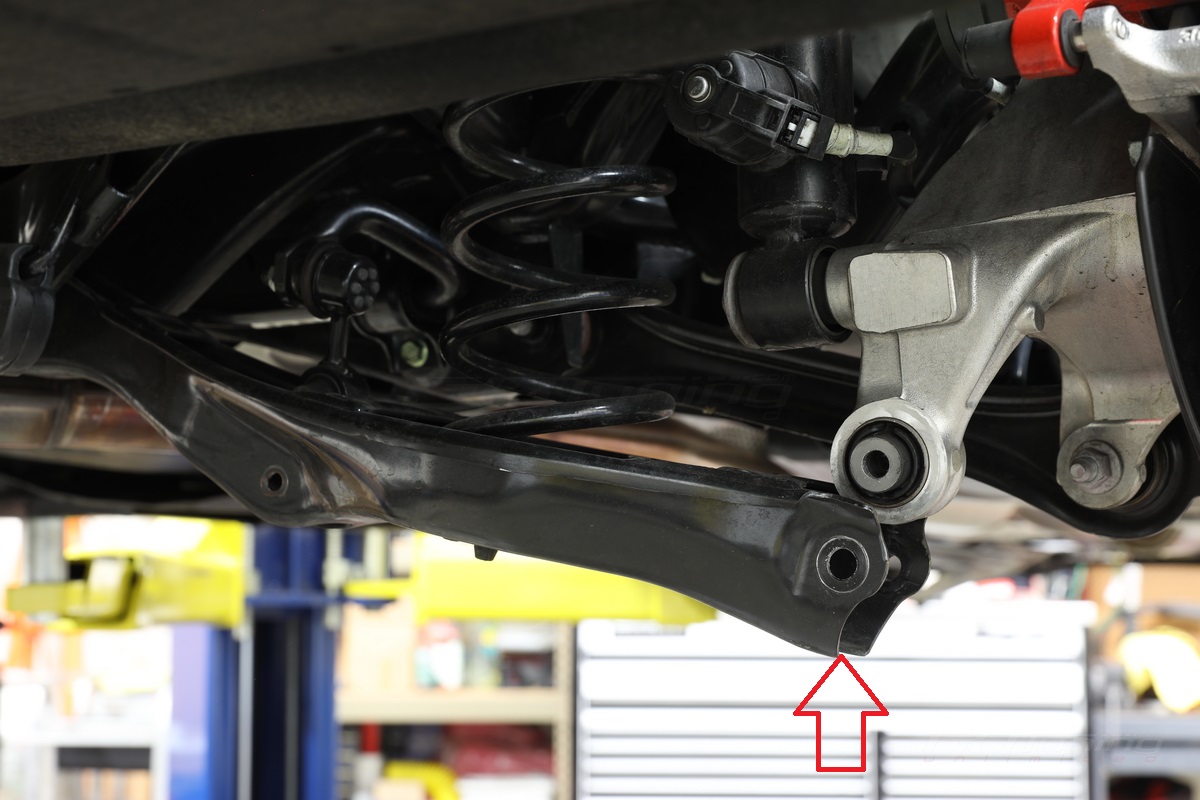
1. Remove undertray (to access lower arm bolts connected to the subframe)

2. Disconnect the swaybar end link side that attached to the strut on BOTH sides of the car by removing the nut. This prevents the suspension from binding when dropping the strut. Pull the link out of the strut.

3. Disconnect damper electrical connector (pry the tab up in the gap).

4. Remove the bracket holding the connector line and brake line.

5. Disconnect ride height sensor bracket that connects to the lower arm.

6. Disconnect the front suspension link. (behind plastic brake air guide)

7. Remove the bolts that hold the front lower arm to the subframe. (3 bolts)

8. Remove the two pinch bolts holding the bottom of the strut

9. Remove the nuts on the top of the strut to the body.

10. At this time you can pull off the locating tab in order to get some extra camber in the front.

11. Pull the lower arm out of subframe and be careful not to pull the driveshaft out. At this time the whole assembly should be loose and provide enough clearance to wiggle the strut out. (Sorry no proper picture here)

12. Use spring compressors to compress the spring and take the top nut off holding the hat.

13. Cut off one section the bump stop.

14. Transfer over the rubber bases and take note of how it slots onto the spring and bottom perch.

15. Compress the spring and install it on the strut. Make sure all the rubber pieces are correctly positioned as they tend to shift during assembly.

16. Reinstall onto the car in reverse order.

Rear
1. Remove the bolt holding the swaybar link to the lower arm.

2. Remove the bolt holding the lower arm to the knuckle.

3. Pull the lower arm down and the spring should fall out.

4. Transfer over the rubber perches and take make sure the tabs are aligned when reinstalling.

5. Put a floor jack under the lower arm and raise it until the bolt holes line up.
6. Reinstall the two bolts.

Front
1. Remove undertray (to access lower arm bolts connected to the subframe)
2. Disconnect the swaybar end link side that attached to the strut on BOTH sides of the car by removing the nut. This prevents the suspension from binding when dropping the strut. Pull the link out of the strut.
3. Disconnect damper electrical connector (pry the tab up in the gap).
4. Remove the bracket holding the connector line and brake line.
5. Disconnect ride height sensor bracket that connects to the lower arm.
6. Disconnect the front suspension link. (behind plastic brake air guide)
7. Remove the bolts that hold the front lower arm to the subframe. (3 bolts)
8. Remove the two pinch bolts holding the bottom of the strut
9. Remove the nuts on the top of the strut to the body.
10. At this time you can pull off the locating tab in order to get some extra camber in the front.
11. Pull the lower arm out of subframe and be careful not to pull the driveshaft out. At this time the whole assembly should be loose and provide enough clearance to wiggle the strut out. (Sorry no proper picture here)
12. Use spring compressors to compress the spring and take the top nut off holding the hat.
13. Cut off one section the bump stop.
14. Transfer over the rubber bases and take note of how it slots onto the spring and bottom perch.
15. Compress the spring and install it on the strut. Make sure all the rubber pieces are correctly positioned as they tend to shift during assembly.
16. Reinstall onto the car in reverse order.
Rear
1. Remove the bolt holding the swaybar link to the lower arm.
2. Remove the bolt holding the lower arm to the knuckle.
3. Pull the lower arm down and the spring should fall out.
4. Transfer over the rubber perches and take make sure the tabs are aligned when reinstalling.
5. Put a floor jack under the lower arm and raise it until the bolt holes line up.
6. Reinstall the two bolts.
Sponsored
Last edited: