amaru08
Member
- First Name
- Austin
- Joined
- May 15, 2020
- Threads
- 1
- Messages
- 22
- Reaction score
- 29
- Location
- Clearwater
- Vehicle(s)
- 2018 Civic Si Sedan
Are you still rubbingWhiteline adjustable lower front balljoint!
Probably the only set out in the world for testing out of Whitelines headquarters lol.
These balljoints will be available through @Unity Performance very soon! Onto the product.
Overall build quality is amazing and it is a pretty straight forward install. After install i immediately noticed the steering its much stiffer and feels a lot better. And smoother. Highly recommend this for anyone on stock shocks that want more camber without having the need to buy coil overs. Or if you want more camber than the coils can offer.
Overall very pleased with this product!!!!
I took as many pictures as I can in order to cover each stage. If you have any pictures feel free to ask away!
Tools needed:
17mm socket
17mm box end wrench
18mm socket
19mm flex socket
Desired 1/2inch length extension
36mm axle nut socket
Balljoint separator, hammer, air hammer

Had to use these jacks on each wheel to raise the car in order to get the hoist arms underneath haha! The Mugen sides hang lower than the oem side skirts.

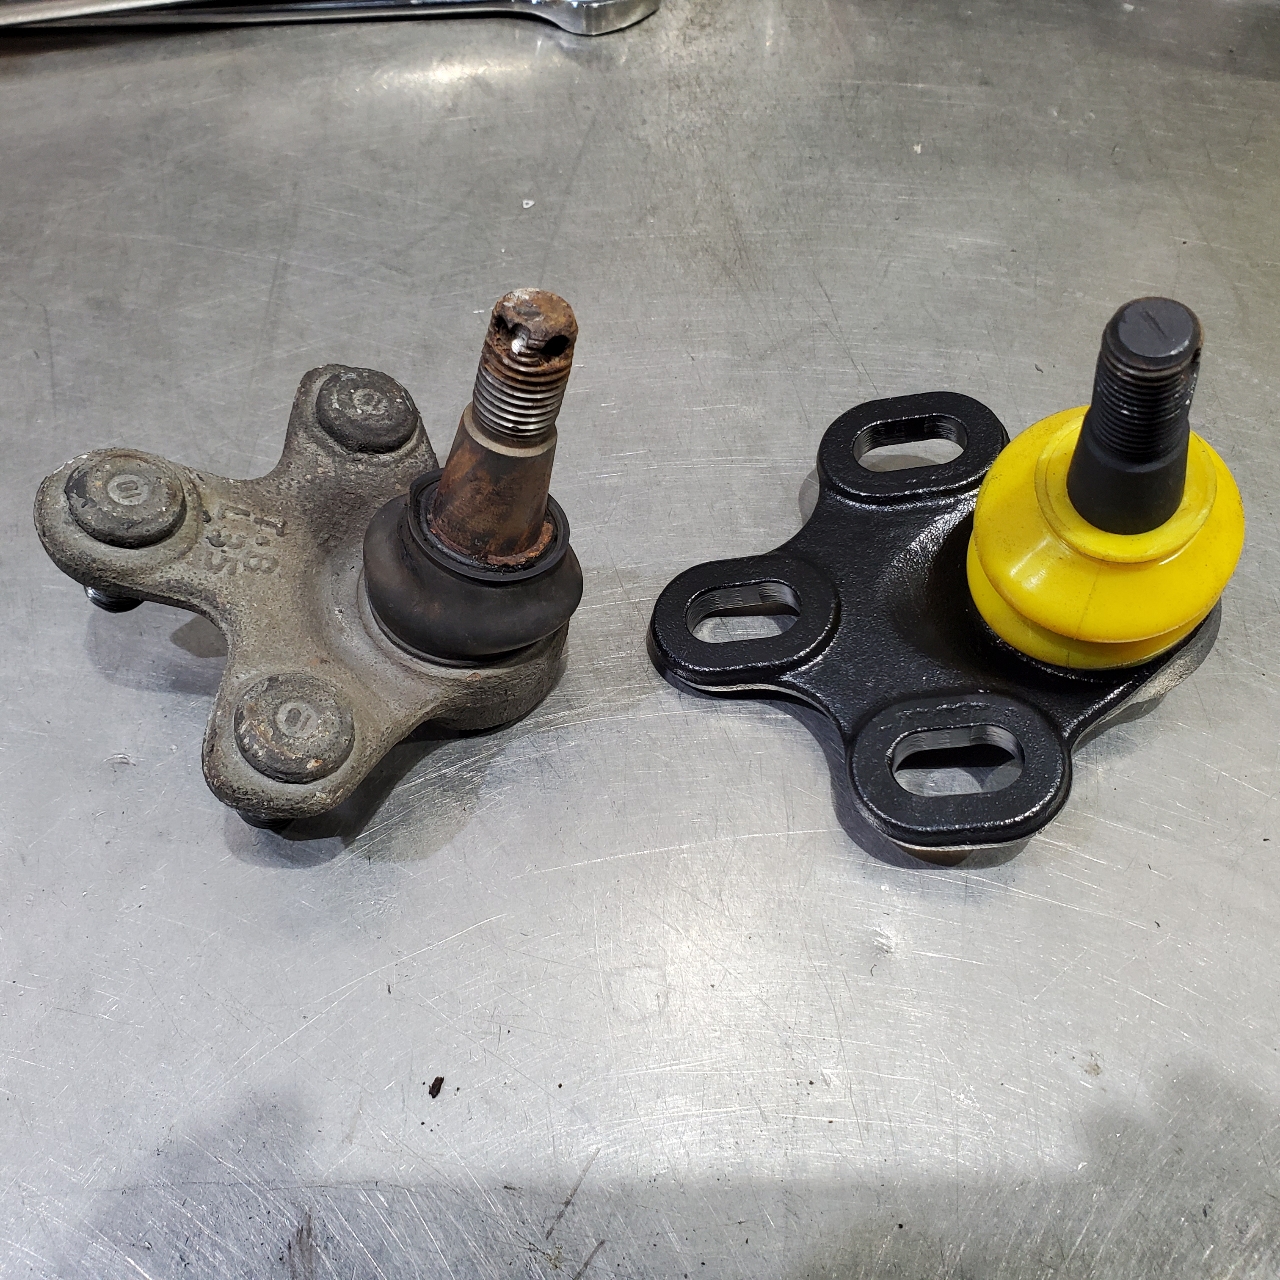
Picture of the stock balljoint

Remove this cotter pin/clip from the lower balljoint.

Remove 3x 17mm nuts under the control arm for the ball joint.

Remove 19mm castle nut...as you can see that's not possible.
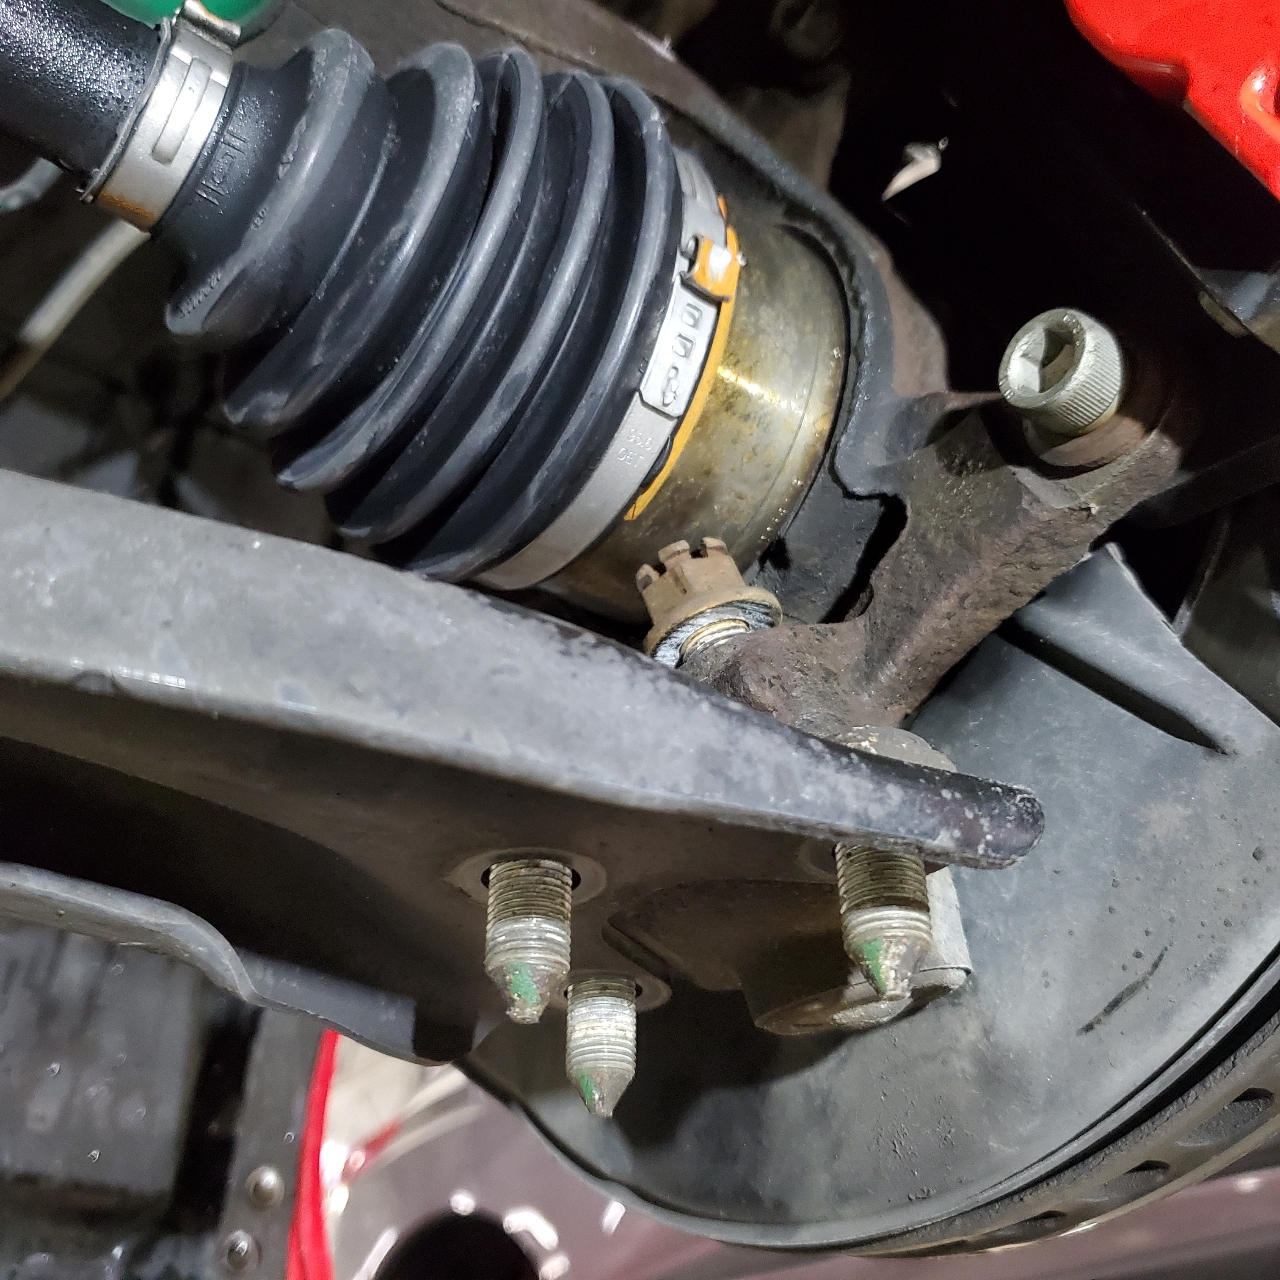
Remove 36mm axle nut

Pull out axle from hub and remove lower balljoint from lower control arm

Use a balljoint separator tool if you have, or hammer the lower balljoint mounting space or use an air hammer to remove old balljoint.

These are the nuts that were removed
- 3x 17mm lower balljoint bolts
- 1 axle nut
- 1 19mm castle nut
- 1 cotterpin/clip

These are what were installed

Here are some comparison pictures between oem and Whiteline


I installed the castle nut first along with the cotter pin

Installed lower balljoint bolt and nut but when tightening I pushed it in all the way for a oem spec install. (Didn't need too much more camber yet)
Used a 17mm box end wrench to hold the top of the bolt while using a gun with 18mm socket to tighten the bottom nuts.
Tightened axle nut to 190 foot lbs.

Some installed pics.
Whiteline 27mm front swaybar
Whiteline adjustable stabilizer links set to stiff
Whiteline adjustable lower balljoint
27won bbk
TEIN Flex Z coil overs.


